I’m pleased to announce that today we released a new version of Cloud Portam which includes support for Azure Search Service which was announced recently. This blog post talks about Azure Search Service features currently supported in the application. If you’re looking for an application which makes use of this service, I wrote a blog post where I made Azure Blob Storage searchable using this. You can read that post here: https://gauravmantri.com/2014/08/25/making-azure-blob-storage-searchable-using-azure-search-service/.
Features Supported
Following is the list of features currently supported:
- You can manage multiple search service accounts.
- Connect to your search service account in all azure datacenters where search service is available.
- Multiple options to let the application store account API key so that you don’t have to enter it again including storing locally in the browser’s local storage.
- Option to explore search service account contents in read-only or read-write mode to prevent accidental deletes/updates.
- Create new indexes.
- Edit existing indexes.
- Delete indexes.
- View index statistics.
- Set CORS options on indexes so that searches can be performed directly via AJAX.
- Manage Scoring Profiles on indexes.
- Manage weights on searchable fields.
- Manage functions (Distance, Freshness, and Magnitude) on scoring profiles.
- Ability to explore index in read-only or read-write mode to prevent accidental deletes and updates.
Features Walkthrough
Let’s quickly walkthrough some of the features available and how you can use them
Adding Search Service Account
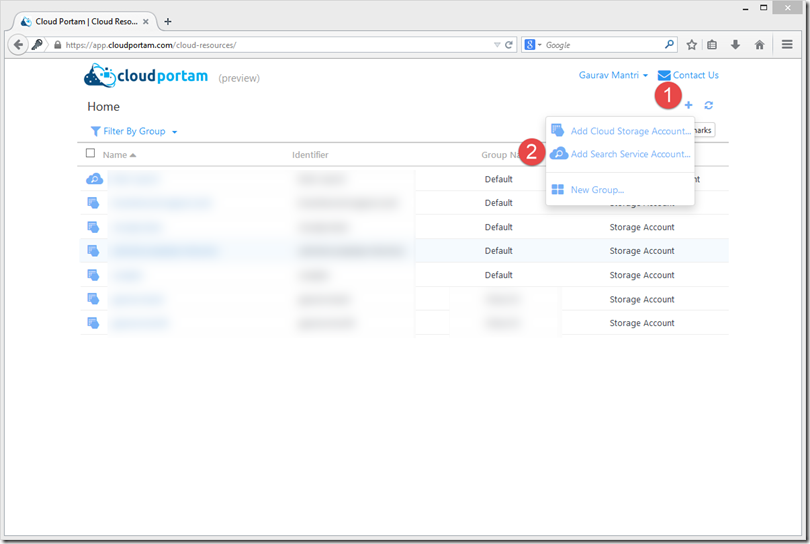
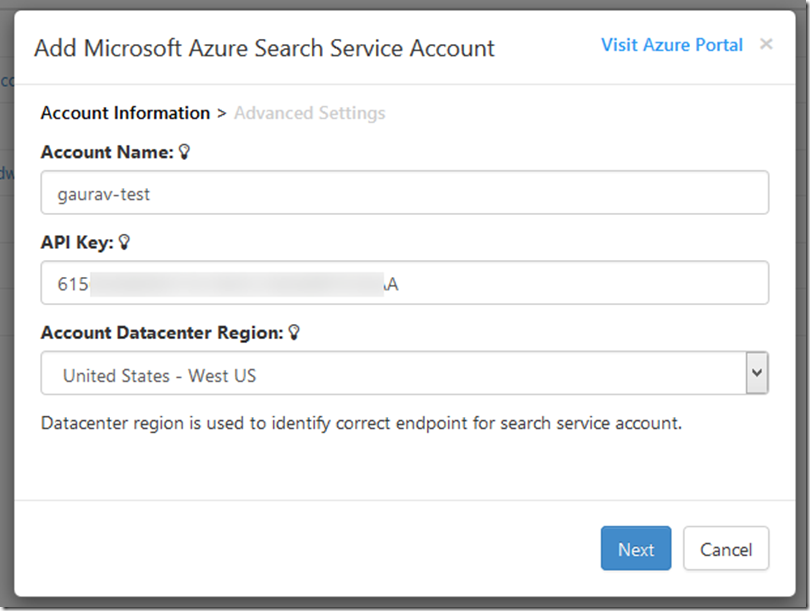
You can add a search service account through Cloud Portam’s dashboard. You would need your search service account name, API key (either Primary or Secondary) and the region where your service is located. You can get this information from new Azure Portal (https://preview.azure.com). Once you have this information you’re good to go.
Enter your Account name, API Key and select appropriate account datacenter region in the popup box and click “Next” button.
If you wish Cloud Portam to save your Search Service API key so that you don’t have to enter it again when using Cloud Portam next time, please check the checkbox which reads “Save API Key” and select appropriate option. If you wish to identify your search service account by a different name, you can enter it in “Friendly Name” box.
After you have made these entries, click on “Finish” button to add this account in Cloud Portam.
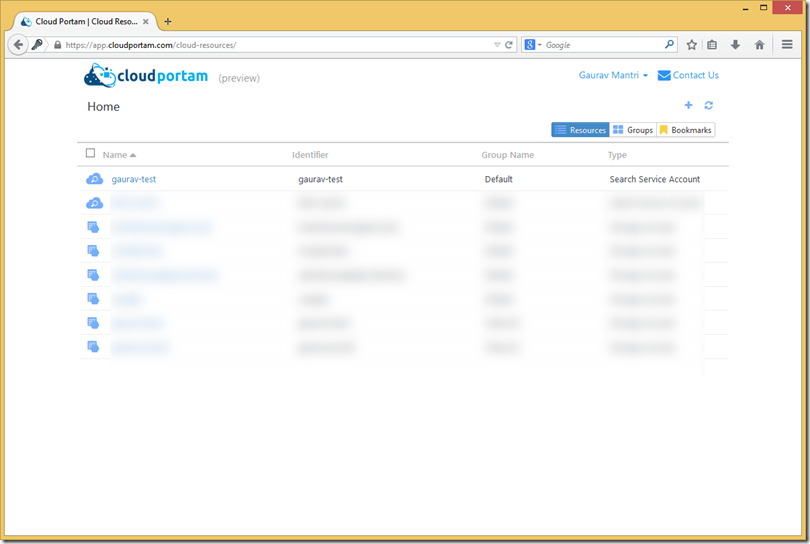
After the account is added successfully, you will see this account in the list of your cloud resources.
To start managing this search service account, click on the name.
Managing Indexes
Once you’re on managing indexes page, you will see the list of all indexes in your search service account. Cloud Portam will show you statistics (documents count and storage size) for each index as well.
To add a new index, click on the “+” icon on top right corner of the screen.
To delete one or more indexes, first select the indexes you wish to delete by “Control+Click” on the rows. Then to delete indexes, you could either right click on one of the selected rows and choose “Delete” context menu item or click on “Delete” button in the button bar above table header and follow the instructions.
Add New Index
When you come on “Add New Index” screen, first thing Cloud Portam asks you is to provide a name for Index. You can change it later on as well during the process of creating an index.
Even though Search Service REST API allows you to define a lot of parameters while creating an Index, we have kept things simple in Cloud Portam. Only thing you would need to do while creating an Index is define Index fields.
We have provided an easy to use interface for adding fields to an index. Based on the Data Type chosen for a field, various properties will be enabled/disabled.
To delete a field row, click on the “Delete” icon on the right-most corner of the row. To delete multiple fields in one go, select those rows and then click on “Delete” icon in the button bar.
Once you have entered all the fields, click on “Save Index” button at the bottom of the screen to create that index. Once the index is created, you will be taken to indexes dashboard.
Important Note: In the current release of search service, once an index has been created it’s fields can’t be edited or deleted. You can add new fields though but existing fields can’t be modified at all. So please be aware of this fact.
You may find this link helpful for adding new Index: http://msdn.microsoft.com/en-us/library/azure/dn798941.aspx.
Edit Index
To edit an index, click on the index name on the indexes dashboard. You will be taken to a screen where you will be able to change the attributes of an existing index.
As mentioned above, you can’t change the existing fields but you can certainly add new fields. To add a new field, just click on Add Field button above table header and a new row will be inserted in the table where you can specify field attributes.
To manage “Scoring Profiles” for index, click on “Scoring Profiles” toggle button.
If your index does not have a scoring profile, you can create a new scoring profile by clicking on “Add Profile…” button.
Once a scoring profile has been created, you can manage weights and functions on that scoring profile.
To manage “CORS Settings” for the index so that browser-based applications can directly perform searches using AJAX, click on “CORS Settings” toggle button.
Once you have made all the changes, click on “Save Index” button to save the index.
You may find these links helpful for editing indexes and managing scoring profiles & CORS settings:
http://msdn.microsoft.com/en-us/library/azure/dn800964.aspx
http://msdn.microsoft.com/en-us/library/azure/dn798928.aspx
Performing Searches
In the current version, we have included only basic text search on your index. To search on searchable fields in your index, just click on search link next to the index name and you will be taken to the search screen.
Enter the text you wish to search and hit enter key. Cloud Portam will display matching search results with 50 results per page.
In the next version, we will include advanced search feature which will have full fidelity with the capabilities offered by Search Service API.
You may find this link helpful for understanding more about searching using Azure Search Service: http://msdn.microsoft.com/en-us/library/azure/dn798927.aspx.
Summary
That’s it for this post. Please (actually “Pretty Please with Cherry On Top”) give it a try and let us know your thoughts. The link to the website is http://www.cloudportam.com and the direct link to the application is https://app.cloudportam.com. If you encounter any bugs, please let us know ASAP so that those can be fixed. During the course of the development of this, we discovered a lot of undocumented business rules and that will be the topic of my next blog post … so stay tuned for that.


